How to Clean Shutters to Make Them Look Like New!
The aesthetic of a home is often defined by the details that frame its view. Shutters, whether they are the stately wooden louvers of a colonial estate or the sleek, functional rollers of a modern apartment, serve as more than just window dressings. They are the guardians of our privacy, the regulators of our natural light, and the thermal barriers that keep our living spaces comfortable. Yet, despite their architectural importance, shutters are frequently the most overlooked elements in a standard cleaning repertoire. Exposed to the elements on the outside and the accumulation of household dust and kitchen grease on the inside, they can quickly transform from a design highlight into a dingy, neglected eyesore.
Restoring your shutters to their original, showroom-quality luster does not require a suite of expensive industrial chemicals or specialized machinery. In fact, the most effective approach to shutter maintenance is rooted in simplicity and the clever use of household staples. By understanding the specific needs of the materials—whether it be the porous nature of seasoned timber or the resilient surfaces of PVC and aluminum—you can implement a cleaning strategy that not only cleans but preserves the integrity of your home’s facade.
The Essential Toolkit for Shutter Restoration
Before diving into the specific mechanics of deep cleaning, one must assemble a toolkit designed for precision and gentleness. The goal is to lift grime without abrading the finish. You will need:
- Microfiber Cloths: These are indispensable for capturing fine particulate matter rather than merely pushing it around.
- A Soft-Bristled Brush: A clean paintbrush or a dedicated upholstery brush is perfect for reaching into the narrow crevices of the louvers.
- Liquid Marseille Soap or Mild Dish Detergent: These provide the necessary surfactant action to break down oils without the harshness of bleach or ammonia.
- Baking Soda: This serves as a mild abrasive for stubborn spots and a natural deodorizer.
- White Vinegar: An essential agent for wooden surfaces, providing a gentle acidic clean that cuts through film without warping the grain.
- A Vacuum with a Brush Attachment: This is the secret weapon for the “dry phase” of cleaning.
The Critical First Step: The Dry Phase
The most common mistake in shutter maintenance is the premature application of water. If you apply a wet cloth to a shutter covered in thick dust, you effectively create a muddy paste that settles deep into the hinges and corners, making the job twice as difficult. Every successful restoration begins with a thorough “dry” cleaning.
Close the shutters completely so the slats are flat. Starting from the top and working your way down, use your vacuum’s brush attachment or a soft dry cloth to whisk away the loose debris. Pay special attention to the “tilt bar”—the vertical piece that moves the slats—as dust tends to congregate at the attachment points. Once the front is clear, flip the slats in the opposite direction and repeat the process for the back. Only once the surface is free of loose grit should you proceed to the “wet phase.”
Tailoring the Technique to the Material
Not all shutters are created equal, and a “one size fits all” approach can lead to disastrous results, particularly with natural materials.
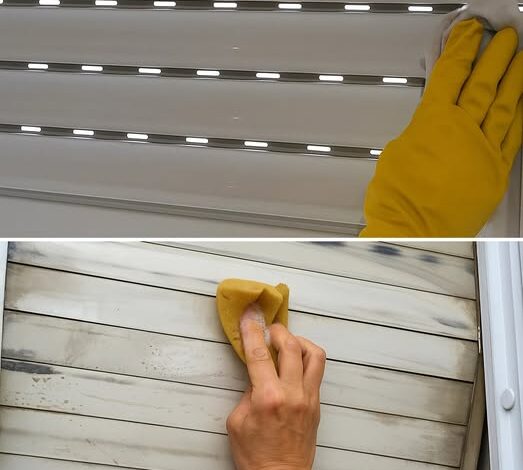
The Resilience of Plastic and PVC
Modern synthetic shutters are prized for their durability, but they are magnets for static electricity, which attracts dust. For these, a solution of warm water and liquid Marseille soap is ideal. If the shutters are small enough to be dismantled, a thorough rinse in a bathtub can save hours of hand-scrubbing. If they are fixed, use a damp (not dripping) microfiber cloth to wipe each slat. The addition of a tablespoon of baking soda to your bucket can help lift the grey “smog film” that often accumulates on exterior PVC from road traffic and environmental pollutants.
The Elegance of Natural Wood
Wood requires a more sophisticated touch. Excess water is the enemy of timber, as it can cause swelling, warping, or the cracking of the protective stain. Instead of soapy water, create a mixture of equal parts warm water and white distilled vinegar. This solution acts as a natural disinfectant and glass-clear cleaner that evaporates quickly. Dampen your cloth in the mixture, wring it out until it is nearly dry, and wipe along the grain of the wood. This method removes fingerprints and grease while leaving a natural, streak-free sheen that honors the wood’s organic texture.
The Industrial Strength of Aluminum
Aluminum shutters are common in high-security or high-wind areas. While they are incredibly sturdy, they are susceptible to pitting if salt or acidic pollutants are left to sit on the surface for too long. Clean these similarly to plastic shutters, but with an extra focus on drying. Use a fresh, dry microfiber cloth to buff the metal after cleaning to prevent water spots or the very early stages of oxidation. Ensure that the mechanical tracks and hinges are clear of debris, as aluminum shutters often rely on precise sliding mechanisms that can be jammed by grit.
Troubleshooting Stubborn Stains and Grime
Occasionally, you will encounter spots that a simple wipe-down won’t touch—fly specks, bird droppings on exterior shutters, or kitchen grease on interior ones. For these areas, create a thick paste of baking soda and a few drops of water. Apply the paste to the spot and let it sit for five minutes. The baking soda will draw out the stain without scratching the paint or finish. Wipe it away with a damp cloth, and the surface should be restored.
Long-Term Maintenance: The “New Look” Secret
The secret to shutters that look “new” for decades isn’t a single deep clean, but rather the prevention of buildup. Once your shutters are pristine, consider applying a very light coating of high-quality furniture wax (for wood) or a specialized UV-protectant spray (for PVC and plastic). These treatments create a microscopic barrier that makes it harder for dust to stick and protects the color from the bleaching effects of the sun.
Furthermore, make it a habit to give your shutters a quick “dry dust” once a week during your regular house cleaning. By spending sixty seconds a week with a microfiber duster, you eliminate the need for the grueling, multi-hour deep cleans that neglected shutters eventually require.
Clean shutters do more than just improve the view; they improve the air quality of your home by removing allergens and dust reservoirs that would otherwise be blown into your living space every time you catch a breeze. By treating these functional pieces of art with the care they deserve, you ensure that your home remains a sanctuary of light, cleanliness, and enduring style. I can provide a more detailed guide on lubricating shutter hinges or choosing the right UV-protectant sprays if you would like to take your maintenance to the next level.